
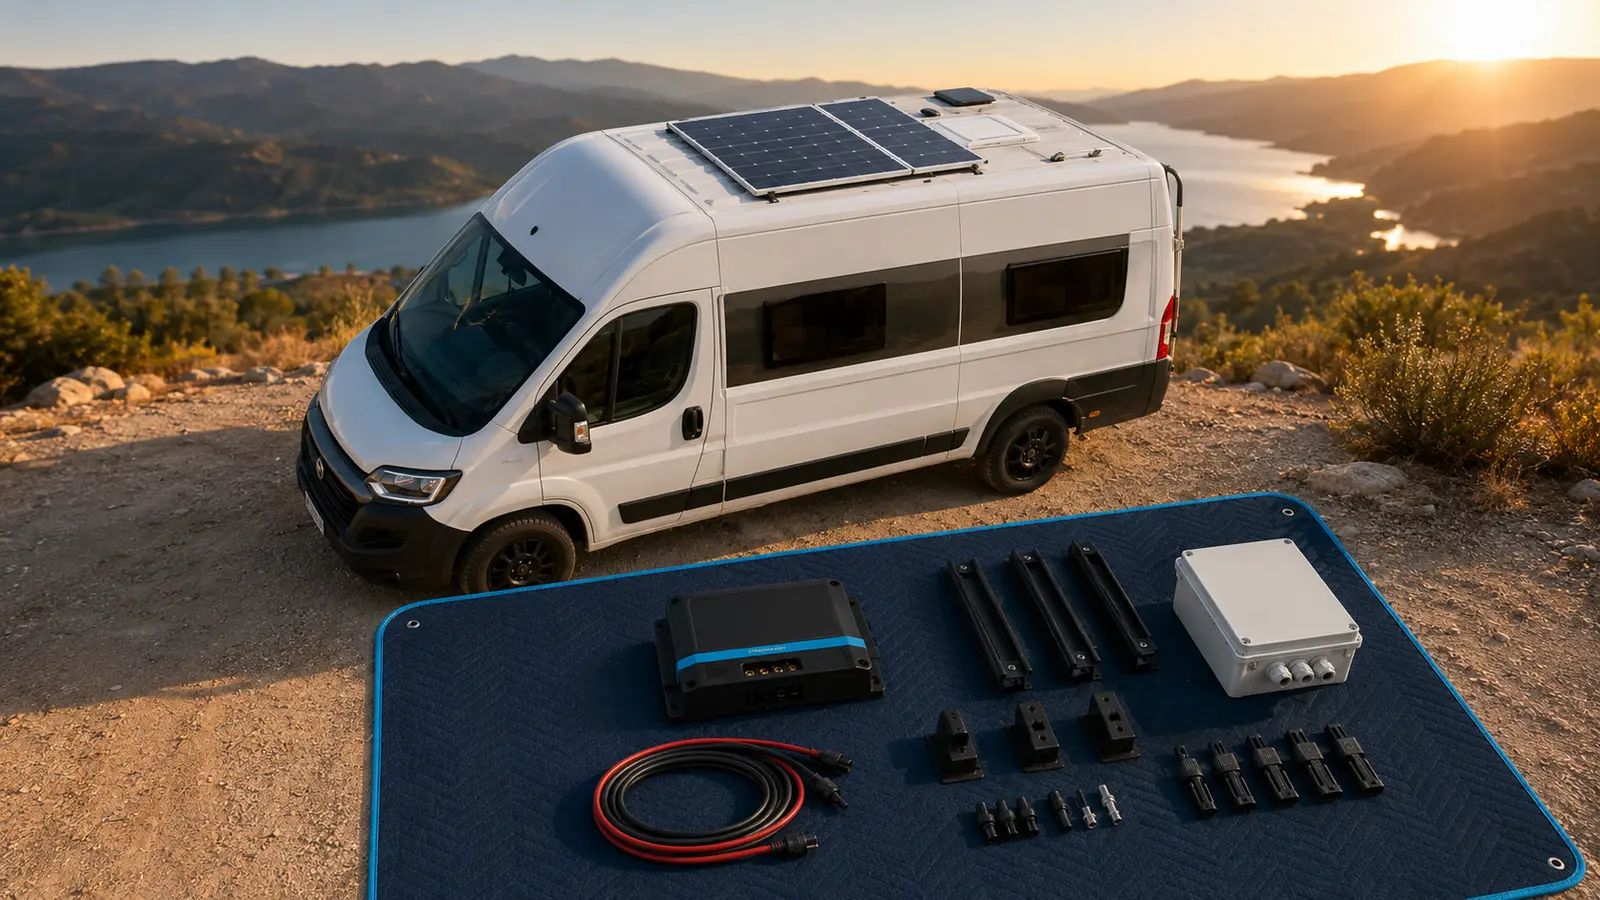
An RV solar panel kit can simplify shopping, but the word “kit” does not guarantee a complete or compatible power system. Some packages contain only panels and mounting hardware. Others add a charge controller and cable. A few include a battery and inverter. The right choice depends on what is already installed in the RV, how much energy is used each day, where the vehicle travels, and whether solar will be the only charging source.
The best buying process starts with a load calculation and ends with a compatibility check. It should not start with the largest wattage number on a product page. A well-matched 300W or 400W system can be more useful than a larger package that exceeds the controller’s voltage limit, does not fit the roof, or cannot recharge the battery under the conditions in which the RV is actually used.
This guide explains what to look for in an RV solar panel kit without assuming that one package suits every camper. Product manuals and applicable electrical requirements take priority over generic diagrams. If the installation involves unfamiliar high-current DC work, roof penetrations, or AC wiring, use a qualified RV or marine electrician.
Quick answer: what should an RV solar kit include?
For a basic battery-charging system, an RV solar kit normally needs panels, a compatible solar charge controller, correctly sized cable, connectors, overcurrent protection where required, and a secure mounting method. It may also need a roof entry gland, disconnects, branch connectors, fuses or breakers, sealant approved for the roof material, and monitoring equipment.
A battery and inverter are separate decisions. Solar panels do not power normal household outlets directly, and a panel-and-controller kit does not store energy. The battery stores energy; the inverter converts battery DC power into AC power when AC appliances are required.
First decide what kind of kit you are buying
The term RV solar panel kit is used for several different packages.
| Kit type | Usually included | Best fit | Common omission |
|---|---|---|---|
| Panel kit | One or more panels, brackets, short leads | Adding panels to a compatible existing system | Charge controller and protection |
| Panel and controller kit | Panels, controller, cable, some mounting hardware | First fixed solar array for an existing battery bank | Battery, inverter, roof-entry parts |
| Portable solar kit | Folding panel, stand, cable, sometimes controller | Temporary use, shaded campsites, rented RVs | Permanent mounting and theft protection |
| Complete power kit | Panels, controller, battery, inverter, distribution parts | New build where all components are selected together | Vehicle-specific cable lengths and installation hardware |
Read the itemized contents instead of relying on the product name. Even a “complete” bundle cannot know the exact roof layout, cable run, battery location, branch-circuit design, or fastening method in a particular vehicle.
As a real market example, Renogy’s current 400W off-grid kit is sold as a panel-based system for RV and off-grid use, while the company also sells a different 400W complete kit that adds batteries. Those are not interchangeable purchases even though both lead with the same panel wattage.
Step 1: calculate daily energy use
Solar array sizing begins with watt-hours, not inverter watts or battery amp-hours. List every electrical load, its typical power, and the time it runs during a normal day.
Daily watt-hours = appliance watts x hours used per day
Cycling appliances need special care. A refrigerator may draw 45W while its compressor runs but will not normally run every minute of the day. Use measured daily consumption, credible product data, or a realistic duty-cycle estimate adjusted for weather. A plug-in energy meter can measure AC loads; a properly installed battery monitor can help measure DC loads.
Here is an illustrative travel-trailer energy audit.
| Load | Planning assumption | Daily energy |
|---|---|---|
| 12V refrigerator | 45W x 9 equivalent run-hours | 405Wh |
| Roof vent fan | 22W x 5 hours | 110Wh |
| LED lighting | 15W x 4 hours | 60Wh |
| Water pump | 60W x 0.2 hour | 12Wh |
| Laptop charging | Daily allowance | 140Wh |
| Phones and small electronics | Daily allowance | 45Wh |
| Controls and standby loads | Daily allowance | 70Wh |
| Estimated daily total | 842Wh |
Adding a 15% planning allowance brings the example to about 968Wh per day. This is not a universal RV number. A propane refrigerator, residential refrigerator, furnace blower, CPAP machine, Starlink terminal, induction cooktop, or air conditioner can change the result dramatically.
Repeat the calculation for a hot day and a cold day. Hot weather can increase refrigeration and fan use. Cold weather can add furnace-blower demand while also reducing battery charging options if the battery cannot accept charge at low temperature.
Step 2: estimate the solar array wattage
A practical first estimate is:
Required panel watts = daily watt-hours / peak-sun-hours / planning factor
Suppose the example RV needs 968Wh per day, the planned location and season provide four equivalent peak-sun-hours, and a conservative 0.75 factor is used for wiring, controller, temperature, angle, dirt, and other losses.
968Wh / 4 / 0.75 = 323W
That result suggests evaluating a 400W kit, not because a 400W panel array produces 400W all day, but because the extra nameplate capacity provides some margin. The calculation must then be checked against roof space, expected shade, local seasonal solar data, controller limits, battery charge-current limits, and backup charging.
Peak-sun-hours are not the same as daylight hours. They express the day’s solar resource as an equivalent number of hours at 1,000 watts per square meter. The U.S. Department of Energy’s PVWatts calculator can help compare locations and months using historical weather data. It was designed for grid-connected PV modeling, so an RV owner should use it as a location and seasonal reference rather than a precise prediction for a moving, flat-roof vehicle.
Step 3: make sure the panels physically fit
Roof space often sets the final limit. Measure the actual unobstructed area rather than the overall roof dimensions. Leave room around vents, skylights, antennas, air conditioners, roof racks, service covers, and safe walking or maintenance paths.
Create a scaled roof drawing using the published panel dimensions and bracket footprint. Check all of the following:
- Panel length, width, thickness, and weight
- Bracket dimensions and required fastener positions
- Roof structural support and manufacturer-approved attachment points
- Clearance around roof equipment and service covers
- Cable routing to the roof entry point
- Airflow and mounting clearance required by the panel maker
- Added vehicle height and potential branch exposure
- Safe access for inspection, cleaning, and removal
Even a narrow shadow from a vent, rack, antenna, or roof box can reduce output. Panel arrangement and internal bypass-diode design influence how severe the effect will be, but shade should be avoided at the layout stage wherever possible.
Rigid, flexible, or portable panels?
Rigid framed panels
Rigid panels normally use glass and an aluminum frame. They are common on permanent RV installations because they are robust, can be mounted with an air gap, and are relatively easy to inspect. The tradeoffs are weight, height, wind exposure, and the need for secure roof attachments.
Flexible panels
Flexible panels are thin and light, which can help on curved surfaces or where height must be minimized. Their performance depends heavily on correct support, adhesion, heat management, and the approved installation method. A panel bonded directly to a hot surface may operate differently from a raised rigid panel. Do not assume “flexible” means it can be repeatedly bent or installed on any curve.
Portable folding panels
Portable panels can be positioned away from a shaded RV and aimed toward the sun. They avoid permanent roof holes and can serve a rented camper. They also require setup, storage, weather awareness, compatible extension cables, and theft precautions. Long undersized cables can waste energy through voltage drop.
Many travelers use a mixed system: a smaller fixed roof array for automatic daily charging and a portable panel for extra energy when parked for several days.
Step 4: check the charge controller, not just the watts
The solar charge controller must match the battery and remain within every input limit under the worst expected conditions. Important specifications include:
- Maximum PV open-circuit voltage, or Voc
- Maximum PV short-circuit current, or Isc
- Maximum operating input current
- Maximum recommended array wattage at the battery voltage
- Maximum battery charge current
- Supported battery chemistries and charging profiles
- Operating and storage temperature range
- Required wire size, fuse rating, and disconnect method
Panel wiring changes voltage and current. Connecting panels in series adds voltage while current remains roughly that of one panel. Connecting them in parallel adds current while voltage remains roughly that of one panel. The controller must be checked against the resulting array, not against one panel.
Cold weather matters because a panel’s open-circuit voltage rises as cell temperature falls. Victron’s SmartSolar documentation specifically warns that maximum PV open-circuit voltage cannot be exceeded and that cold conditions must be included in the calculation. Use the panel’s temperature coefficient and the lowest credible cell temperature, or the manufacturer’s sizing tool, rather than relying on nominal voltage labels.
MPPT versus PWM controllers
An MPPT controller tracks the array’s operating point and converts the available panel power to the battery’s charging voltage. It gives more flexibility when panel voltage is higher than battery voltage and is the usual choice for larger or higher-voltage arrays.
A PWM controller is simpler and can be suitable for a small, intentionally matched panel-and-battery system. It effectively pulls the panel toward battery voltage during charging, so panel voltage compatibility is central to performance.
The presence of “MPPT” on a box does not prove that the controller is large enough. Compare voltage, current, wattage, temperature, and battery-charging specifications line by line.
Step 5: match the battery and charging profile
The kit’s controller must have a charging profile approved for the installed battery. Check absorption or bulk voltage, float behavior, temperature compensation, charge-current limit, and low-temperature rules in the battery manual.
LiFePO4 batteries often permit deeper routine discharge and have a flatter voltage curve than lead-acid batteries, but they need a battery management system and product-specific charging limits. Many LiFePO4 batteries must not be charged below a stated temperature unless they include an approved heating or protection system. Lead-acid batteries have different charging and storage requirements and may require temperature compensation.
Also compare the controller’s possible output with the battery’s maximum charge current. Solar, alternator, and shore chargers may operate at the same time, so their combined current can matter.
Step 6: decide whether the inverter belongs in the kit
An inverter is useful only when AC loads need it. It does not increase battery capacity or solar production. Before buying a bundle with a large inverter, list the AC devices that must run at the same time and check both continuous and startup power.
A 2,000W inverter on a 12V battery can demand well over 150A at high output after efficiency and low battery voltage are considered. That requires a battery and BMS capable of the current, short heavy cable, appropriate overcurrent protection, robust busbars and disconnects, and proper ventilation. A kit that includes a large inverter but underspecifies the rest of that current path is not complete.
For lights, fans, USB charging, a 12V refrigerator, and other DC loads, running directly from protected DC circuits can be more efficient than leaving an inverter on.
Step 7: inspect cables, connectors, and protection
Pre-cut cable saves time only when it is the right type and length. Cable size depends on current, round-trip length, allowable voltage drop, insulation rating, bundling, ambient temperature, terminals, and installation environment.
Look for a kit that clearly identifies:
- Conductor material and actual gauge
- Cable insulation and temperature rating
- Connector type and current rating
- Fuse or breaker type, rating, and interrupt capability
- Required disconnects
- Roof gland and strain-relief method
- Lug size and terminal hardware
- Grounding or bonding instructions
A fuse protects the conductor from excessive current; it is not selected from panel wattage alone. Do not assume the included protection fits a longer cable run or a different installation layout.
Proprietary solar connectors can also complicate future expansion. Confirm whether adapters are approved, whether polarity is standard, and whether the controller accepts the voltage and current of any third-party panel being considered.
Step 8: evaluate mounting and roof sealing
Roof leaks can cost more than the solar kit. Match brackets, fasteners, primers, adhesives, and sealants to the roof structure and membrane. A fiberglass roof, aluminum skin, molded roof, and rubber membrane do not share one universal fastening method.
The roof manufacturer and panel-mounting instructions should determine the process. Clean and prepare surfaces as specified, protect cables from sharp edges, add strain relief, and keep water from following a cable into the vehicle. Do not rely on sealant as the only mechanical attachment unless the engineered system specifically permits it.
Is a complete battery and inverter bundle worth it?
A complete bundle can reduce compatibility work when the battery, controller, inverter, communication equipment, and cables were designed as one system. It can also simplify support because one supplier owns more of the component relationship.
The disadvantages are cost, less freedom to substitute components, and the possibility that standard cable lengths or mounting parts do not suit the RV. Check whether the bundle includes distribution equipment, a main battery fuse, battery disconnect, busbars, monitoring, AC protection, and branch-circuit hardware. Many do not.
RV solar kit buying checklist
Before ordering, write down the answers to these questions:
- What is the measured or estimated daily energy use in watt-hours?
- Which month and location represent the difficult solar season?
- How much unshaded roof area is actually available?
- Will panels be rigid, flexible, portable, or mixed?
- What are the array’s cold-weather Voc and maximum Isc?
- Are those values inside every controller limit?
- Is the controller’s battery profile approved by the battery maker?
- Can the battery accept the maximum combined charging current?
- Are cable sizes correct for the real run lengths and currents?
- Are fuses, breakers, disconnects, glands, brackets, and sealants included?
- Can the system be expanded without replacing the controller or wiring?
- Is there another charging source for cloudy weather and shaded campsites?
Common buying mistakes
Treating panel watts as daily energy
A 400W array is rated for power under defined test conditions. Daily energy is measured in watt-hours and changes with sun, heat, shade, angle, dirt, wiring, controller behavior, and battery state.
Assuming every 12V product is compatible
“12V panel,” “12V battery,” and “12V controller” are convenient product labels, not a complete engineering check. Actual panel Voc and Vmp are higher than battery nominal voltage, and series wiring can multiply voltage.
Buying before measuring the roof
Panel wattage does not describe dimensions. Two arrays with the same wattage can have very different footprints.
Ignoring low-temperature limits
Cold panels can raise array Voc, while some lithium batteries cannot accept charge below their stated temperature. Those are separate temperature checks.
Expecting solar to run air conditioning continuously
Air conditioning is a high-energy load. A roof array may offset part of the demand in strong sun, but battery storage, inverter output, startup current, weather, duty cycle, and limited roof area must all be calculated. A small kit should not be marketed as an automatic all-day air-conditioning solution.
Frequently asked questions
Is a 200W solar kit enough for an RV?
It can be enough for light loads and favorable sun, but there is no universal answer. If daily demand is 500Wh and the array delivers three effective peak-sun-hours at a 0.75 planning factor, a 200W array would estimate about 450Wh before considering whether that season is representative.
Is a 400W RV solar panel kit enough?
For many moderate systems it is a useful starting size, but it should be compared with daily watt-hours, roof shade, season, location, and backup charging. A residential refrigerator, electric cooking, or climate control may require substantially more energy than a 400W roof array can reliably replace.
Does an RV solar kit need a battery?
The panels and controller can supply charging power only while solar energy is available. A battery stores that energy and supports loads when clouds pass or the sun is down. Most off-grid RV systems therefore use a battery bank.
Can panels be added later?
Only if the controller’s voltage, current, and power limits, the roof layout, cable capacity, connectors, and battery charge-current limit allow the expansion. Plan the future array before buying the first controller.
Can a portable panel connect directly to an RV battery?
Not unless the panel or cable path includes a compatible charge controller and the installation follows the battery and equipment instructions. Raw panel output should not be connected directly to a battery.
Final recommendation
Choose an RV solar panel kit only after the energy audit, roof drawing, and compatibility worksheet are complete. The useful kit is the one that fits the vehicle, stays inside the controller’s worst-case limits, charges the installed battery correctly, includes appropriate protection, and leaves a realistic path for cloudy days and future expansion.
Sources and references
- U.S. Department of Energy, Solar Photovoltaic Technology Basics: https://www.energy.gov/cmei/systems/solar-photovoltaic-technology-basics
- U.S. Department of Energy, Solar Photovoltaic Performance and Efficiency Basics: https://www.energy.gov/cmei/systems/solar-photovoltaic-performance-and-efficiency-basics
- U.S. Department of Energy, Photovoltaic System Design and Energy Yield: https://www.energy.gov/cmei/systems/photovoltaic-system-design-and-energy-yield
- U.S. Department of Energy, Solar Photovoltaic System Design Basics: https://www.energy.gov/cmei/systems/solar-photovoltaic-system-design-basics
- PVWatts Calculator: https://pvwatts.nlr.gov/pvwatts.php
- Victron Energy, SmartSolar MPPT Manual: https://www.victronenergy.com/upload/documents/Manual_SmartSolar_MPPT_75-10_up_to_100-20/29694-MPPT_solar_charger_manual-pdf-en.pdf
- Renogy, 400W 12V Off-Grid Solar Kit: https://www.renogy.com/products/renogy-400w-12v-general-off-grid-solar-kit
- Renogy, 400W Complete Solar Kit: https://www.renogy.com/products/400w-12-volt-complete-solar-kit-with-two-100ah-deep-cycle-agm-lifepo4-batteries
Editorial note: Energy-production calculations are planning estimates, not output guarantees. Recalculate them with the exact panel, controller, battery, cable run, location, weather, and installation conditions.
Related guides: van solar fundamentals and van electrical system planning.